Zombie Brain Recipe
Get ready to thrill your guests with our spine-chilling Zombie Brain recipe, the ultimate Halloween treat that’s sure to impress! This fun and spooky dessert features a creamy, deliciously sweet concoction that resembles a brain, making it a perfect centerpiece for your Halloween party. Serve it in a brain-shaped mold for maximum effect, and watch as your guests are both intrigued and delighted. Ideal for Halloween gatherings, themed parties, or as a fun dessert for trick-or-treaters, our Zombie Brain recipe is easy to prepare and guaranteed to start conversations. Embrace the spooky spirit of the season and treat your friends and family to this deliciously ghoulish dessert!
Ingredients
To create your creepy Zombie Brain, you will need the following ingredients:
- Jello: 1 package (any flavor, preferably green or red for a creepy effect) – the flavor is up to your preference, but green apple or cherry works well for the Halloween theme.
- Whipped Cream: For topping – this adds a creamy layer that enhances the texture and appearance of the brain.
- Gummy Worms: A handful for decoration – these will give a fun, creepy element to your dessert.
Instructions
1. Prepare the Jello
You can begin by following the package instructions to prepare the Jello. Generally, this involves dissolving the Jello powder in boiling water. Stir until completely dissolved, and then add cold water as specified on the package. For an extra spooky twist, consider using sparkling water to add a bit of fizz to your Jello!
2. Mold the Jello
Once your Jello mixture is ready, pour it into a brain-shaped mold. If you don’t have a brain mold, feel free to use other fun shapes or even a regular bowl. The key is to ensure the shape you choose can hold the Jello while it sets, enhancing the dessert’s spooky aesthetics.
3. Chill
After pouring the Jello into the mold, refrigerate it. Allow the Jello to chill and set completely, which typically takes about 4 hours. It’s crucial to be patient, as the longer it sets, the better it will hold its shape when unmolded.
4. Unmold the Jello
Once the Jello is fully set, carefully remove it from the mold. This can be done by briefly dipping the mold in warm water to loosen the edges. Then, invert it onto a serving plate. Give it a gentle shake to help release the Jello; it should come out easily if it has set correctly.
5. Decorate
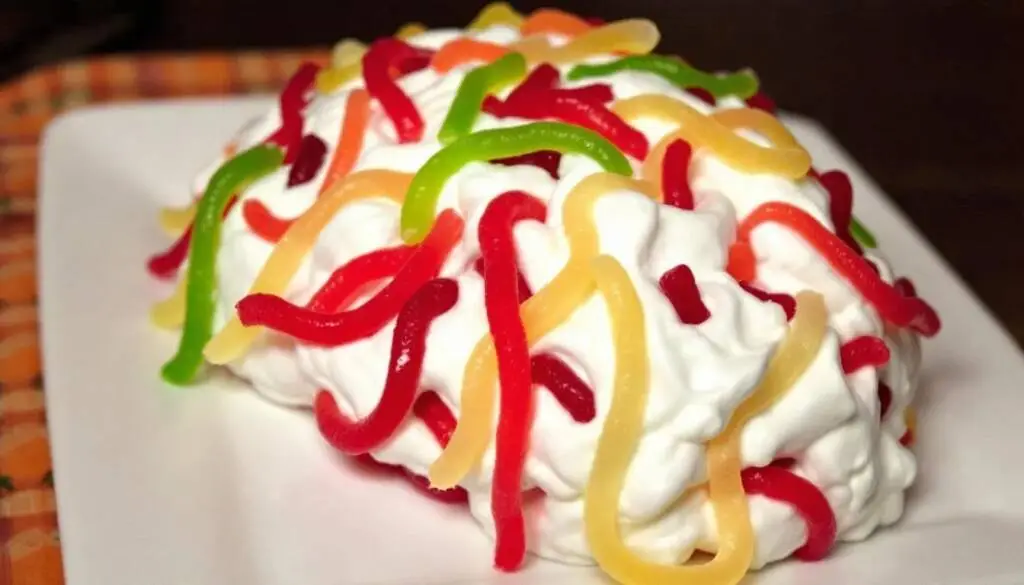
The next step is to top the unmolded Jello with a generous layer of whipped cream. Use a spatula or spoon to create peaks and valleys, mimicking the texture of a real brain for a more authentic look.
Next, let your gummy worms drape over the sides of the Jello. Scatter them playfully to create a creepy, fun effect that will captivate your guests’ attention.
6. Serve
Now your Zombie Brain is ready to be served! You can just spin it like you would a cake and delight in the reactions of your party guests as you present this ghoulish dessert. It’s ideal for Halloween parties, potlucks, or just as a fun surprise for the family while celebrating the spooky season!
Additional Tips
- Flavor Variations: You can experiment with different Jello flavors for a unique taste or even layer different colors for a more decorative approach.
- Extra Garnishes: Consider adding chocolate shavings or sprinkles on top of the whipped cream for added visual appeal.
- Kid-Friendly Option: This dessert is easy enough for kids to help prepare, making it a fun family activity. Just supervise the use of boiling water!
Conclusion
Your Zombie Brain dessert promises to be not only delicious but also a visually captivating centerpiece for your Halloween festivities. With its easy preparation and spooky aesthetic, this dessert will become a favorite among your guests. Enjoy your deliciously eerie creation, and have a hauntingly good time at your Halloween party!
Disclaimer:
This recipe is intended for informational purposes only. Please check for any allergies or dietary restrictions before preparing the dish. The creator of this recipe is not responsible for any adverse reactions or consequences resulting from its use. Always exercise caution when handling kitchen tools and ingredients. Enjoy cooking!