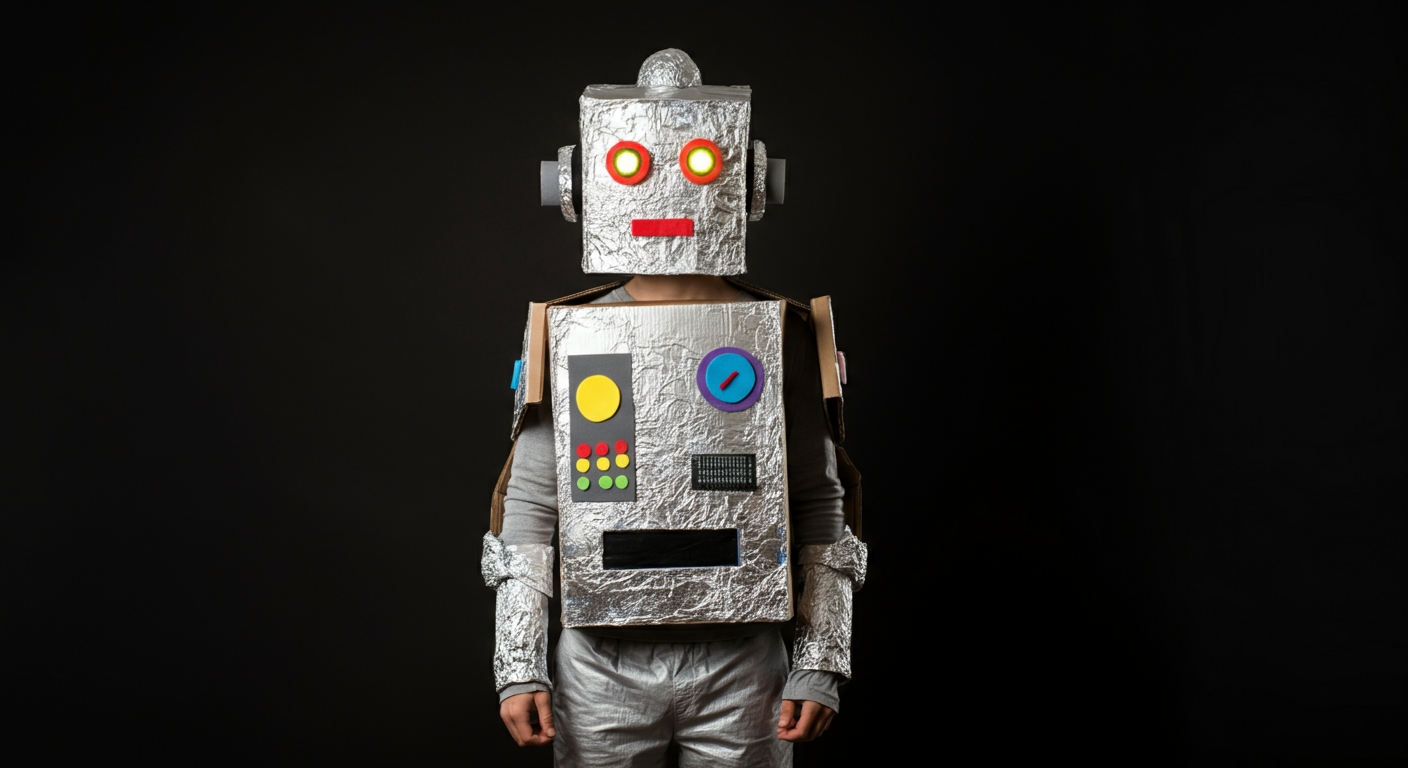
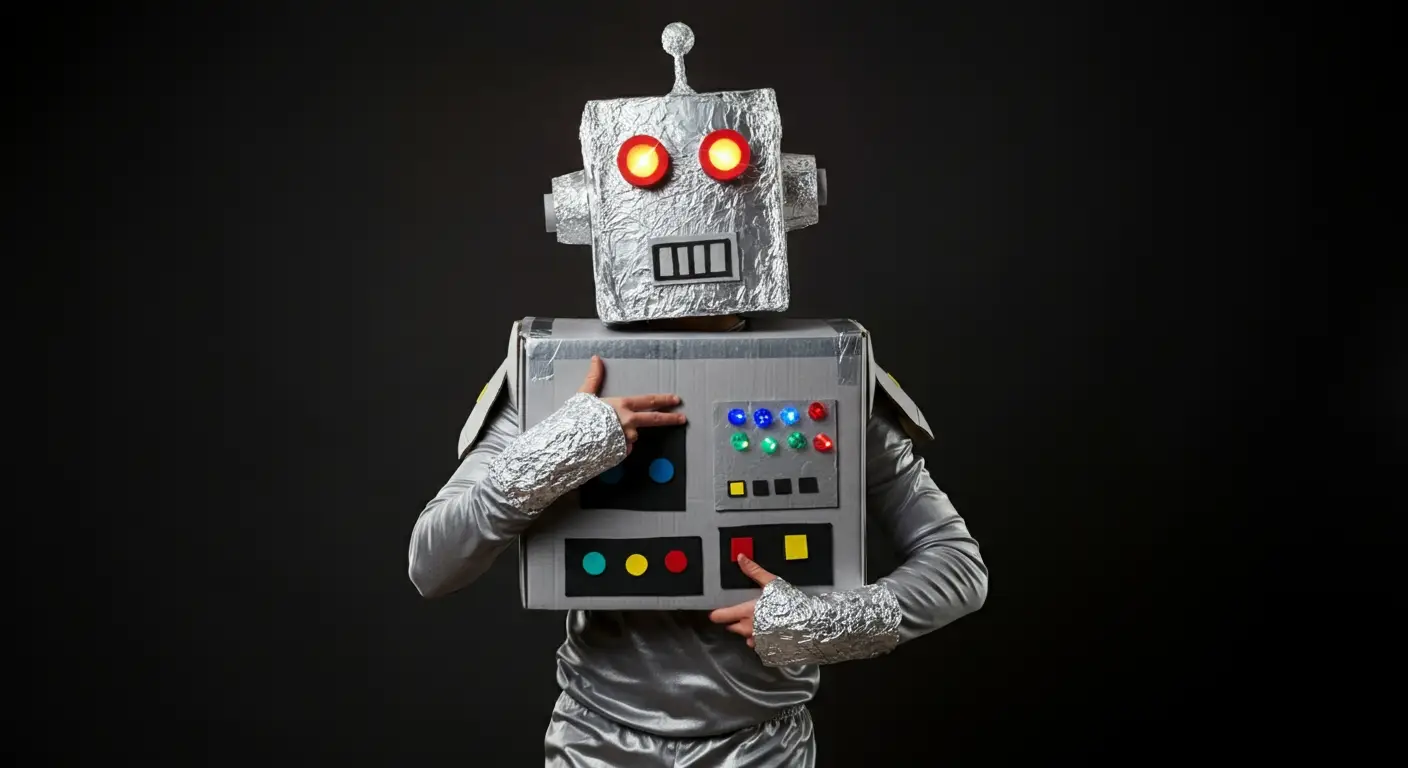
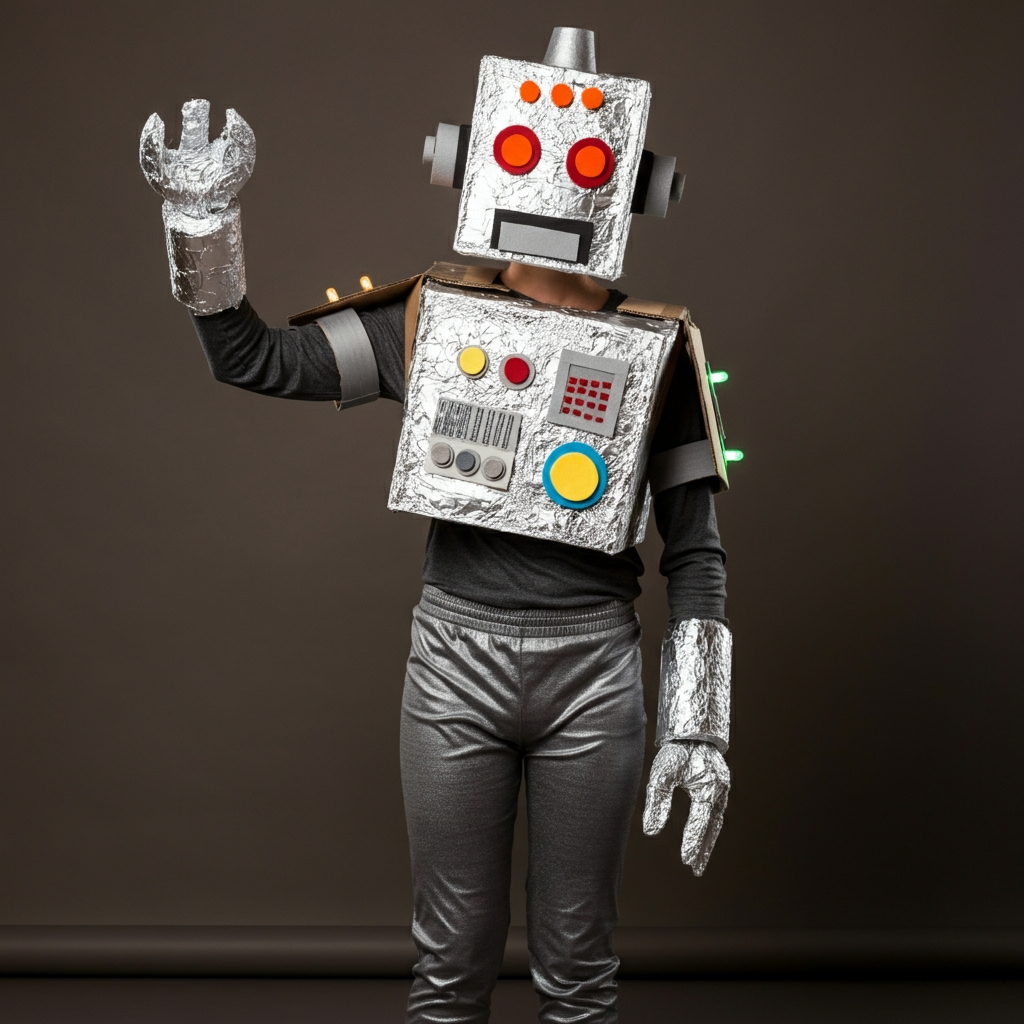
Creating an InfoStarBase Robot costume can be a fun and creative project that allows you to explore the exciting world of science fiction and technology! This imaginative costume idea combines futuristic elements with a playful twist, making it perfect for Halloween, themed parties, or cosplay events. With a focus on unique designs and eye-catching details, you can craft a robot that reflects your personal style. Here’s a detailed guide on how to make your InfoStarBase Robot costume, including materials you’ll need, step-by-step instructions, and tips for enhancing the overall look. Get ready to unleash your creativity and become the star of the show with your one-of-a-kind robot creation!
Materials Needed
-
Base Clothing:
- Silver or gray long-sleeve shirt and pants or a jumpsuit
- Optional: Black or metallic gloves
-
Body Structure:
- Cardboard boxes (various sizes for the body, arms, and legs)
- Aluminum foil (for a metallic look)
- Duct tape or hot glue
-
Decorative Elements:
- Craft foam or felt (for buttons and details)
- LED lights (battery-operated for eyes or buttons)
- Paint (silver, black, or bright colors for accents)
-
Accessories:
- Old computer parts or gadgets (for added detail)
- A cardboard box for a head or a helmet
- Straws or tubing (for antennas or robotic arms)
Step-by-Step Instructions
-
Create the Robot Body:
- Torso: Use a large cardboard box as the main body. Cut armholes on the sides and a hole for your head at the top. Cover the box with aluminum foil for a shiny, metallic finish.
- Arms: Use smaller cardboard boxes or tubes (like wrapping paper tubes) for the arms. Cover them with aluminum foil as well. Attach them to the torso using duct tape or glue.
- Legs: You can use cardboard boxes or create leg covers using aluminum foil-covered tubes for the legs. Attach them securely to the torso.
-
Create the Robot Head:
- Box Head: Use a smaller cardboard box for the head. Cut out holes for your eyes and mouth. Cover the box with aluminum foil.
- Helmet Option: Alternatively, you can create a helmet using a larger cardboard piece, shaping it to fit your head. Decorate it with buttons and lights.
-
Add Details:
- Use craft foam or felt to create buttons, dials, and other robotic features. Glue or tape these onto the body and head.
- If you have old computer parts (like circuit boards or wires), attach them to the costume for added detail.
-
Incorporate LED Lights:
- Use battery-operated LED lights to create eyes or buttons. You can attach them to the head or body for a glowing effect. Make sure the battery pack is easily accessible.
-
Create Antennas:
- Use straws or tubing to create antennas. Attach them to the top of the head using tape or glue. For a fun touch, add small balls or pom-poms to the ends.
-
Final Touches:
- Test the costume for comfort and mobility. Make any necessary adjustments to ensure you can move easily.
- Consider adding a robotic voice effect using a voice changer app or a small speaker on your phone.
Tips for Enhancing the Robot Costume
- Color Variations: While silver and gray are classic robot colors, you can use brighter colors for a more playful look.
- Group Costumes: If you’re going with friends, consider coordinating your robot designs to create a robot army or a specific theme (like retro robots).
- Interactive Features: Incorporate sound effects or robotic noises to enhance the experience. For example, a small speaker can play sounds as you move.
- Comfort: Ensure that the costume is comfortable for movement, especially if you plan to wear it for an extended period.
Conclusion
With these steps, you can create a fantastic InfoStarBase.com robot costume that is both fun and visually striking. This project allows for creativity and personalization, making your robot unique and memorable for Halloween or any costume event!
Disclaimer:
This costume is intended for entertainment purposes only. Please ensure that it is suitable for the intended age group and use. Always supervise children while wearing costumes. We encourage cultural sensitivity and respect in costume choices.

